
To start – this problem is fairly common, but also pretty niche. If this scenario does not work for you, hopefully it will at least spark some ideas on how to use conditionally formatted buttons!
When creating extremely refined user experiences in Power BI, it is important to avoid having your end users get lost in the filtering process. I was working on the Cloud9 reporting when faced with this issue, and came up with this cool idea to handle it that I have since implemented in multiple reports with customers.
Problem
Often, Power BI reports will have a set of slicers that operates as a hierarchy. When navigating the filters, an end user will start from the top layer, and work their way down the hierarchy to the desired filter depth. All good… until it is time to change your filters! To get back to the point where the top layer can be adjusted, the user will have to deselect back up the same hierarchy of slicers to then change that top layer. (While the hierarchy slicer itself is a fairly good way to handle this, it is not always the cleanest implementation to your design)
Note: this method is ideal when your top layer in your slicer hierarchy has just a few distinct values. If you have more than 4, use the hierarchy slicer instead and work your design around it, because this will not be practical.
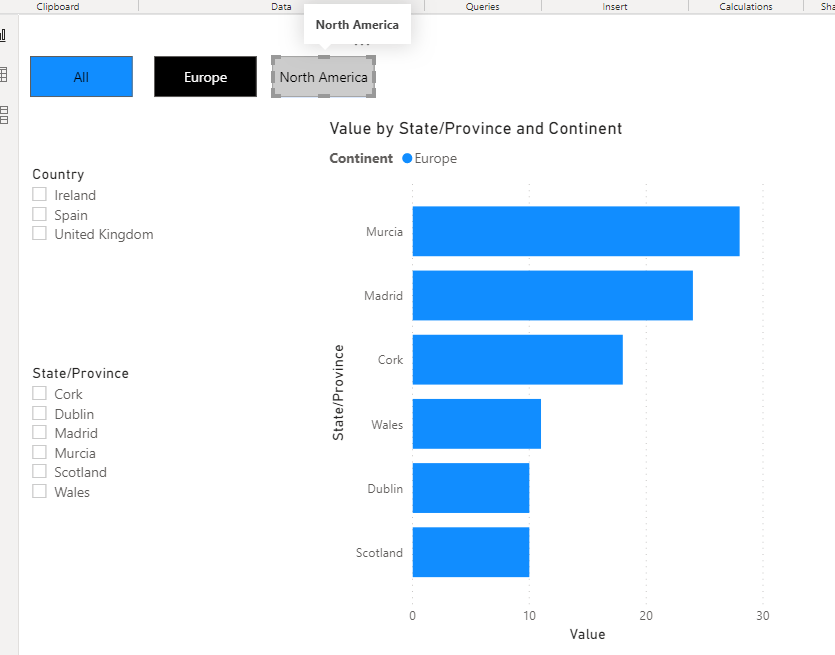
In this example, I am using a hierarchy of Continent, Country, and State/province:

As you can see, you have to work back up the hierarchy to switch out your Continent. It is possible to turn the slicer interactions off so the selections will stay available and clickable, but this will result in Blank visuals and a bad user experience:

Solution: Bookmarking and Conditionally formatted buttons
To start, we are going to create a button for each of our Continents, as well as an “All” Button. These will eventually replace our Continent slicer (but don’t delete your slicer!) :

Next, we will create bookmarks that impact all of our slicers. The “All” bookmark will reset all slicers to no selections.
IMPORTANT STEP: Hide your Continent Slicer! Don’t worry, we are going to use it still… we just don’t want it to show because our buttons will act as the slicer for continent. The slicer still works even when hidden.
Select your slicers, create a new bookmark, and toggle on “Selected visuals”
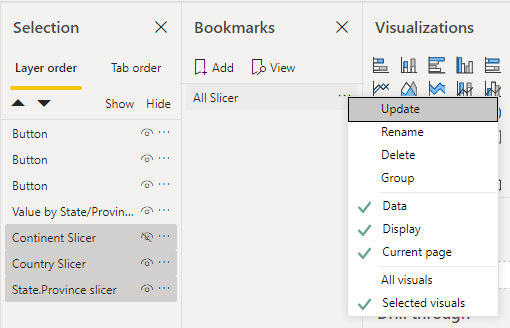
You can now assign this bookmark to the “All” Button:

Next, we will repeat the same steps for North America and Europe top layers.
Unhide your continent slicer, and select North America, then hide the slicer and repeat the bookmarking process
IMPORTANT: Leave your Country and state/province slicers UNSELECTED. We want them to reset when we toogle across our buttons to avoid the aforementioned Blank issue.


Repeat the same steps for Europe
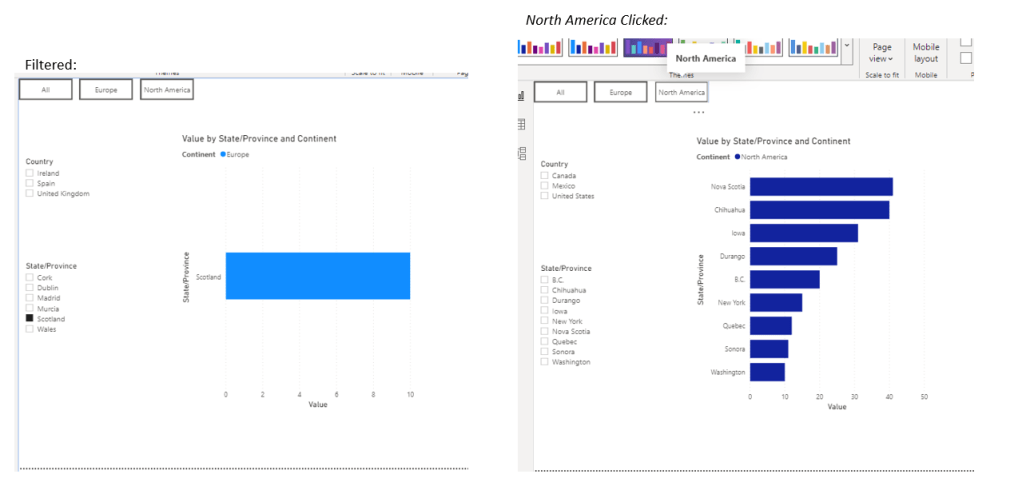
Now check your buttons and validate they are working as expected. To see the impact, select a slicer item for a State/Province, then click a button for a continent and see that your slicers will reset:
Now that all of our buttons are linked up and bookmarks are ready, we need a good way to tell the user which continent they have selected. This is where our conditionally formatted buttons come into play!
Conditionally formatting buttons
There are many ways to do this, and you will likely have a better way to get the DAX right to handle it if you are really good with DAX. I admit that I am a hack when it comes to DAX 🙂
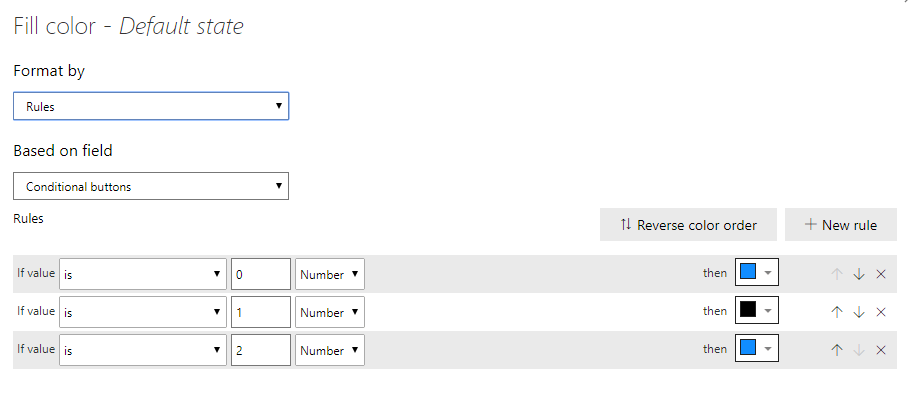
Create Measures for your conditional formatting
We need to translate our Distinct values from the top layer into numbers to make the conditional formatting work, so we will start with some simple dax:
Conditional buttons = IF(ISFILTERED(‘Table'[Continent]), IF(FIRSTNONBLANK(‘Table'[Continent],0)=”North America”, 1, IF(FIRSTNONBLANK(‘Table'[Continent], 0)=”Europe”, 2)), 0)
This will return 0 for “all”, 1 for “North America” and 2 for “Europe”
Apply our formatting to the buttons.
This part can be as complex as you want it to be. I will show conditional formatting of the Fill and the Text color, but you can take it much further than that if needed.
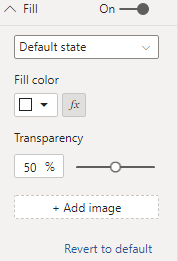
Start with your “All” button, and go to Fill and select the conditional formatting Icon:
Apply formatting to darken the button when in a “selected” state

No do the same thing for Text Color on the button, but lighten that one to make it show up better:

Optional: Take it to the next level with conditionally formatted Hover Actions
For high quality user experiences, it is important to make things operate as the end user would expect them to. One of the ways to highlight something is clickable is to give it a good hover action.
I like to have my “Selected” buttons have no change on Hover, and my unselected items change color to show they are clickable.
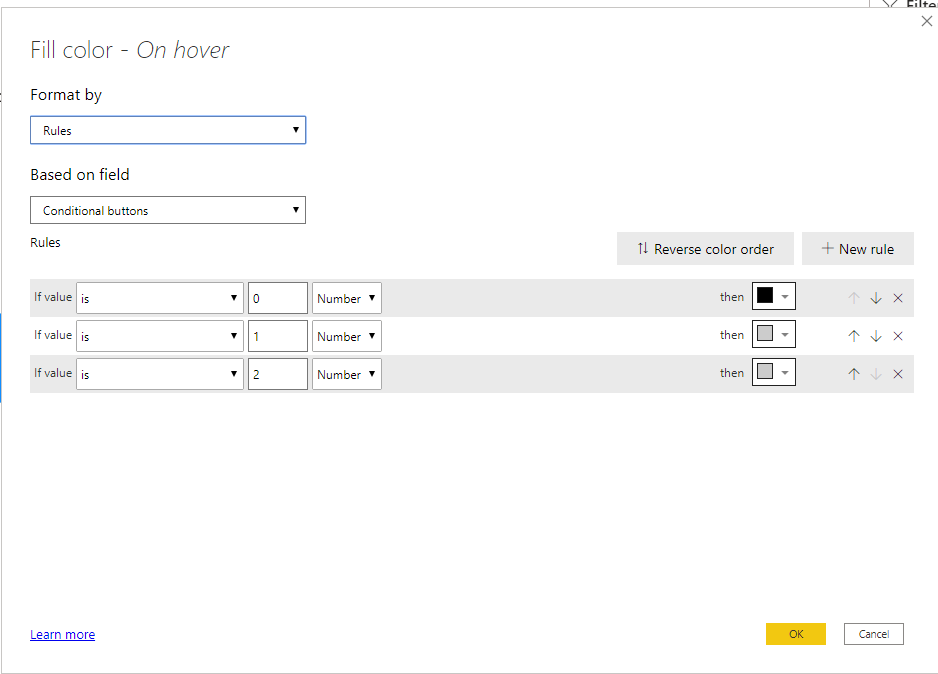
We can achieve all of this via the same steps above, but toggling to the “Hover” state and modifying our coloring:

The coloring is a little counterintuitive. We want it to look different on hover but ONLY when it is not also “Selected”, so we match our selected state formatting when our measure = 0, and give it a different tone when not:
We now have an “All” button that looks selected when there are no continents filtered:

Looks unselected when one of our other options is selected:

And gives the hover effect needed to show it is a clickable item:

Apply to the other buttons
Now use the format painter to apply the same formatting to Europe and North America buttons, and Modify your rules to apply the same Selected/Unselected formatting for their respective numbers (Europe = 2, North America = 1):
North America formatting:


Here is our end result:

With Hover action:
Currently, Buttons support conditional formatting on the following:
- Text (Text itself)
- Font Color
- Icon Line color
- Outline Color
- Fill Color (Not transparency though!)
If implemented well, this solution will prevent your end users from having to navigate back up the hierarchy to make further selections, and avoid conflicting filters that end up causing your users to see blank visuals.


